Creamy Chocolate Brownie Cups
Highlighted under: Dessert Bowl Recipes
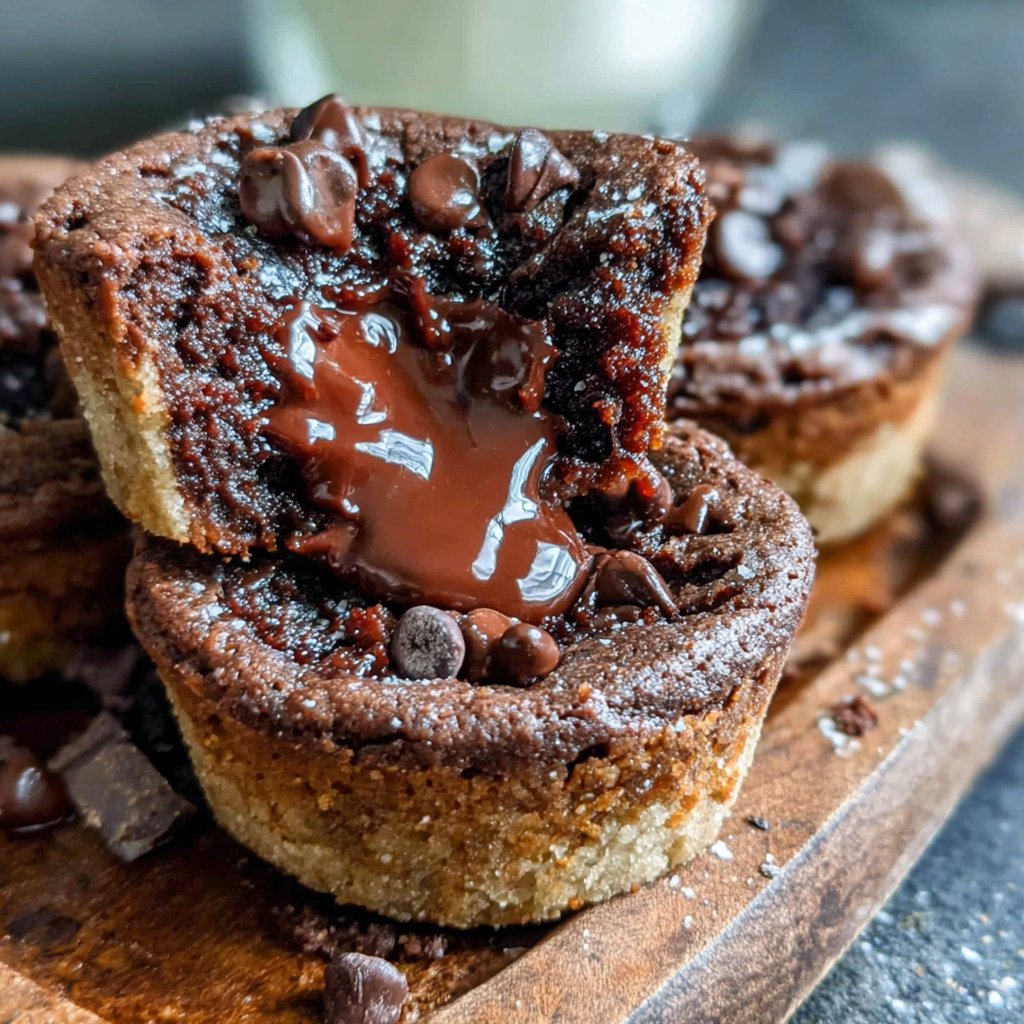
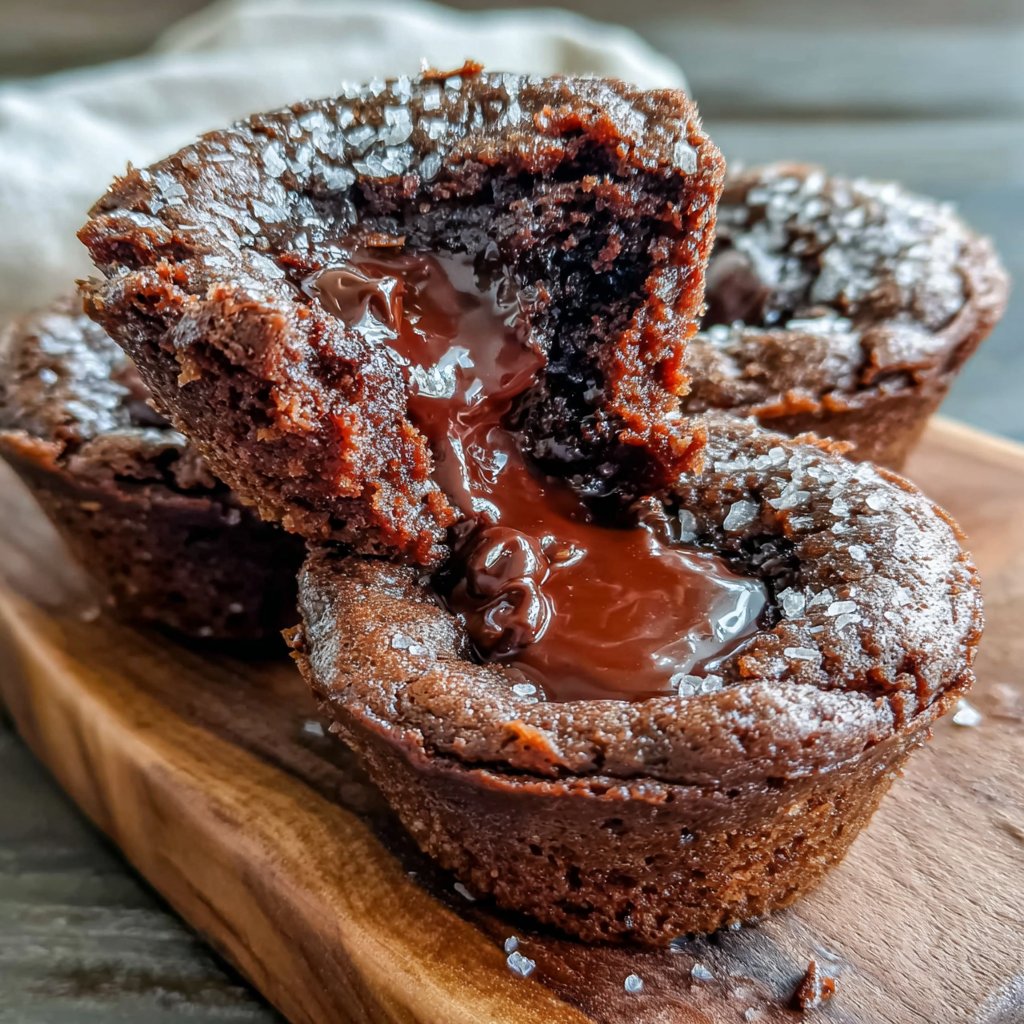
I absolutely adore these Creamy Chocolate Brownie Cups! The moment I took my first bite, I was hooked by their luscious texture and rich, decadent flavor. It's hard to believe how easy they are to make. I found that the secret to achieving that perfect creaminess lies in using high-quality chocolate and a touch of cream. Whether you’re treating yourself or hosting a gathering, these delightful cups always impress and disappear quickly. Trust me, once you try them, you’ll find it hard to resist going back for another!
During one of my baking adventures, I decided to combine two of my favorite treats: brownies and creamy chocolate filling. The result was nothing short of a revelation! I meticulously experimented with different ratios of chocolate to cream, and found the ideal balance to create an incredibly smooth filling that pairs beautifully with the brownie base.
Another tip I discovered is to let the brownie cups cool completely before adding the filling. This step is crucial for maintaining the integrity of both layers, ensuring that every bite is a delightful blend of textures. Now, these brownie cups have become a staple at my gatherings!
Why You Will Love This Recipe
- Rich chocolate flavor paired with fresh orange zest
- Creamy texture that melts in your mouth
- Perfect for celebrations or as a sweet indulgence
Mastering the Brownie Base
The brownie base is the foundation of these delightful cups and getting it right is essential. One key technique is ensuring your butter is melted but not too hot when you incorporate the sugar and eggs. This helps to maintain the integrity of your eggs and ensures a richer brownie texture. Pour the batter into the muffin cups carefully, filling them just halfway; overfilling might lead to spillage while baking, resulting in a mess in your oven.
When baking the brownie base, keep an eye on them during the last few minutes. As they bake, you'll notice the edges set while the center remains slightly soft. This is perfect – under-baking allows for a fudgy interior, which complements the creamy filling beautifully. If you mistakenly overbake, don’t fret! A few additional toppings can salvage the texture; consider adding a scoop of ice cream on top when serving!
Creating the Perfect Creamy Filling
To achieve that luscious creamy filling, using high-quality semi-sweet chocolate chips is non-negotiable. The chocolate's fat content directly affects the creaminess; opt for a brand with at least 50% cocoa for the best results. When heating the heavy cream, remember not to bring it to a full boil. Just heating until it's steaming will effectively melt the chocolate without curdling, which can occur if the cream is too hot.
After pouring the heated cream over the chocolate chips, allowing it to sit for a couple of minutes is crucial. This allows the chocolate to soften adequately, yielding that coveted smooth and glossy texture once stirred. If your filling ends up grainy, it could indicate the chocolate didn’t melt completely. Just reheat gently, stirring continuously until the mixture comes together beautifully.
Ingredients
Brownie Base
- 1/2 cup unsalted butter
- 1 cup granulated sugar
- 2 large eggs
- 1 tsp vanilla extract
- 1/3 cup unsweetened cocoa powder
- 1/2 cup all-purpose flour
- 1/4 tsp salt
- 1/4 tsp baking powder
Creamy Filling
- 1 cup semi-sweet chocolate chips
- 1/2 cup heavy cream
- 1/2 tsp vanilla extract
Instructions
Prepare the Brownie Base
Preheat your oven to 350°F (175°C) and grease a muffin tin. Melt the unsalted butter in a saucepan over low heat. Once melted, remove from heat and stir in sugar, eggs, and vanilla extract until well combined. Add cocoa powder, flour, salt, and baking powder; mix until just combined. Evenly pour the batter into the muffin tin cups, filling each about halfway.
Bake the Brownies
Bake in the preheated oven for 20 minutes or until a toothpick inserted comes out with a few moist crumbs. Remove from the oven and allow them to cool for about 15 minutes in the pan before transferring them to a wire rack to cool completely.
Make the Creamy Filling
In a small saucepan, heat the heavy cream until just boiling. Remove from heat and pour over the chocolate chips in a bowl. Let it sit for 2 minutes, then stir until smooth and glossy. Add vanilla extract and mix well.
Assemble the Cups
Once the brownie cups have cooled, carefully spoon the creamy filling into each cup until filled just to the top. Allow them to set in the refrigerator for at least 30 minutes before serving.
Pro Tips
- For an extra flavor twist, consider adding a pinch of sea salt on top of the creamy filling before chilling. It enhances the chocolate flavor beautifully.
Creative Variations
These brownie cups are incredibly versatile. For a citrus twist, consider adding orange zest to the brownie batter or mixing it into the creamy filling. This adds a lovely brightness that contrasts beautifully with the rich chocolate. You can also experiment by substituting half of the semi-sweet chocolate chips with dark chocolate or even white chocolate for an entirely different flavor profile.
If you want to add a bit of crunch, sprinkle chopped nuts, like walnuts or pecans, into the brownie batter before baking. Just ensure they’re evenly distributed so every bite has a delightful crunch. Alternatively, you can top the creamy filling with crushed cookies or candy for a fun presentation!
Storage and Make-Ahead Tips
These brownie cups can be made ahead and are perfect for meal prepping! Once they have set in the refrigerator, you can store them in an airtight container for up to five days. Just be sure to layer parchment paper between them if you’re stacking them to prevent sticking.
If you're planning to freeze them, wrap each brownie cup in plastic wrap securely and store them in a freezer-safe container. They can be frozen for up to two months. When you’re ready to enjoy, simply thaw in the refrigerator overnight. For an indulgent treat, try warming them slightly in the microwave before serving; the creamy filling will regain its luscious texture.
Questions About Recipes
→ Can I use dark chocolate instead of semi-sweet?
Absolutely! Dark chocolate will add a richer taste to the filling.
→ How can I store leftover brownie cups?
Store them in an airtight container in the refrigerator for up to 3 days.
→ Can I freeze these brownie cups?
Yes, you can freeze them! Wrap each cup individually in plastic wrap and store in an airtight container for up to 2 months.
→ How do I know when the brownie base is done?
When the edges look firm and a toothpick inserted comes out with a few moist crumbs, they’re ready!
Creamy Chocolate Brownie Cups
Created by: The Chefbradrecipes Team
Recipe Type: Dessert Bowl Recipes
Skill Level: Easy
Final Quantity: 12 cups
What You'll Need
Brownie Base
- 1/2 cup unsalted butter
- 1 cup granulated sugar
- 2 large eggs
- 1 tsp vanilla extract
- 1/3 cup unsweetened cocoa powder
- 1/2 cup all-purpose flour
- 1/4 tsp salt
- 1/4 tsp baking powder
Creamy Filling
- 1 cup semi-sweet chocolate chips
- 1/2 cup heavy cream
- 1/2 tsp vanilla extract
How-To Steps
Preheat your oven to 350°F (175°C) and grease a muffin tin. Melt the unsalted butter in a saucepan over low heat. Once melted, remove from heat and stir in sugar, eggs, and vanilla extract until well combined. Add cocoa powder, flour, salt, and baking powder; mix until just combined. Evenly pour the batter into the muffin tin cups, filling each about halfway.
Bake in the preheated oven for 20 minutes or until a toothpick inserted comes out with a few moist crumbs. Remove from the oven and allow them to cool for about 15 minutes in the pan before transferring them to a wire rack to cool completely.
In a small saucepan, heat the heavy cream until just boiling. Remove from heat and pour over the chocolate chips in a bowl. Let it sit for 2 minutes, then stir until smooth and glossy. Add vanilla extract and mix well.
Once the brownie cups have cooled, carefully spoon the creamy filling into each cup until filled just to the top. Allow them to set in the refrigerator for at least 30 minutes before serving.
Extra Tips
- For an extra flavor twist, consider adding a pinch of sea salt on top of the creamy filling before chilling. It enhances the chocolate flavor beautifully.
Nutritional Breakdown (Per Serving)
- Calories: 380 kcal
- Total Fat: 26g
- Saturated Fat: 15g
- Cholesterol: 195mg
- Sodium: 85mg
- Total Carbohydrates: 32g
- Dietary Fiber: 3g
- Sugars: 24g
- Protein: 6g